Welcome to the best place to find information about setting up your home internet. A reliable Wi-Fi connection is no longer a luxury; it’s a basic need, just like electricity or running water. This is because more and more of our work, school, entertainment, and social lives are happening online. But for a lot of people, the job of starting a new network from scratch can seem like a huge task, full of technical jargon and a confusing number of options. Just hearing the words “wireless router installation” can make you feel a little panicky.
You might be a student setting up your first off-campus housing, a family moving into a new home, or someone who has simply decided it’s time to take control of your digital domain. If you’re reading this, chances are you’re standing at the threshold of a new home, a new apartment, or simply a new era of digital independence, asking the fundamental question: “how to get Wi-Fi?”
Don’t worry. This isn’t just another how-to book. This is your friendly, complete beginner internet guide made by experts who know that not everyone speaks “geek.” We’ll show you how to do everything from the ground up. We’ll explain the terms, help you make decisions, and give you a clear, step-by-step plan to turn a box of scary electronics into a fast, safe, and stable home network.
When you finish this guide, you’ll not only have set up Wi-Fi successfully, but you’ll also know why each step is important, which will help you fix problems and make your network better for years to come. Let’s get rid of the confusion and get you hooked up.
Getting Started: Your Beginner’s Guide to Getting Online
Before we get into the nitty-gritty of connecting things and going through settings, it’s important to know the basic parts that work together to bring the internet into your home and send it wirelessly. Before you watch the game, think of it as getting to know the key players on the team.
What is Wi-Fi, Exactly? An easy comparison
Think of the internet as a huge global water supply, and your Internet Service Provider (ISP) as the company that runs a big pipe to the edge of your property. That’s the internet connection that uses wires. How do you get water to your kitchen sink, shower, and garden hose all at once without running separate pipes to each?
That’s when Wi-Fi comes in. Your wireless router is like a high-tech sprinkler system or a water tower just for your home. It takes the main internet connection from the “pipe” (your modem) and sends it out as radio waves through the air. Your laptops, smartphones, smart TVs, and gaming consoles are like the taps and sprinklers; they can all pick up this wireless signal and turn it back into usable internet. In short, Wi-Fi is the technology that lets you use the internet without being tied to a physical cable.
The Key Players: What You’ll Need to Set Up Your Home Internet
There are a few important pieces of hardware that make up your home network. The first step to a successful setup is to know what each one does.
- Internet Service Provider (ISP): This is the company you pay to get on the internet. In the US, this includes Comcast/Xfinity, AT&T, Verizon, and Spectrum. In the UK, this includes BT and Sky. They are the main way to get to your house.
- Modem (Modulator-Demodulator): This gadget connects your home to the outside world. It connects to your ISP’s service line, which could be a coaxial cable, fiber optic cable, or phone line. Then it changes the signal from your ISP into a standard internet signal that a computer or router can understand.
- Wireless Router: This is the most important part of your home network. It takes the modem’s one internet connection and turns it into your local wireless network, or Wi-Fi. It lets different devices use the same internet connection and talk to each other. It also works as a basic firewall and a digital traffic cop, adding another layer of security.
- Gateway (or Modem/Router Combo): A lot of ISPs now offer a single piece of hardware called a gateway. This is a handy device that does the job of both a modem and a router. Using separate devices is often more flexible and gives you more control, which we’ll talk about later.
- Ethernet Cables: These are the actual cables that connect devices to the network. At the very least, you’ll need one to connect your router to your modem. Most of the time, a wired connection through an Ethernet cable is faster and more stable than Wi-Fi.
- Your Devices: For the initial setup, a computer (desktop or laptop) is highly recommended because it’s usually easier to find your way around the router’s settings on a bigger screen. You will also need a smartphone or another device that can connect to Wi-Fi to test the connection.
Step 1: How to Get Wi-Fi—Choosing Your Internet Service Provider (ISP)
You need to get your internet set up before you can even think about routers and passwords. This means picking an Internet Service Provider and a plan that works for you. This is probably the most important choice you’ll have to make when setting up your home internet.
Finding ISPs in Your Area
Your location often limits your choice of Internet Service Provider (ISP). Not every provider serves every area.
- How to Find Providers: The best place to start is with websites that collect information from many different sources. In the US, you can use the FCC’s National Broadband Map or commercial sites like BroadbandNow and HighSpeedInternet.com to find out which companies provide service at your address.
- Talk to Your Neighbors: One of the best things you can do is ask your new neighbors what service they use and if they like it. They can give you real-world information about how reliable and helpful local businesses are.
Understanding Internet Plans: Speed, Data Limits, and Contracts
When you know what your options are, you’ll have to choose from a confusing list of plans. Let’s look at the most important words.
- Speed (Bandwidth): This is measured in megabits per second (Mbps) and, for very fast connections, gigabits per second (Gbps). This number shows how many megabits of data can be downloaded (download speed) or uploaded (upload speed) in one second.
- Up to 100 Mbps: Enough for 1–2 people to browse, stream HD video, and play some online games.
- 100–400 Mbps: This is a great range for a family of three to four. Can handle a lot of 4K video streams, heavy online gaming, and video conferencing while working from home.
- 400 Mbps – 1 Gbps (1000 Mbps): This is great for homes with a lot of smart home devices, multiple 4K/8K streamers, serious gamers, or people who download big files a lot.
- Multi-Gig (2 Gbps+): This is too much for most homes right now, but it might be worth thinking about for homes with very high needs or to make sure they are ready for the future.
- Data Caps: Some plans that are less expensive only let you use a certain amount of data each month. If you go over this limit, you may have to pay more or have your speeds slowed down a lot (“throttled”). If your family watches a lot of video, especially in 4K, you should get a plan with unlimited data.
- Contracts: If you sign a 12- or 24-month contract, many ISPs will give you a lower starting price. Make sure you read the fine print and know what the price will be after the promotion ends and what the penalty is for ending the deal early.
There are many kinds of internet connections, such as fiber, cable, DSL, satellite, and 5G home internet.
The type of connection you have will have the biggest effect on how fast and reliable it can be.
- **Fiber Optic (like Verizon Fios or AT&T Fiber): This is the best. It sends light signals through thin strands of glass, which gives it symmetrical (or almost symmetrical) download and upload speeds. It’s very fast, dependable, and has low latency (delay), which makes it great for video calls and gaming. Pick fiber if it’s available and cheap.
- Cable (like Xfinity or Spectrum): This is the most common type of high-speed internet. It uses the same coaxial cable lines as cable TV. It has great download speeds, but its upload speeds are usually much slower. For most people, it’s a great choice.
- DSL (Digital Subscriber Line): This technology uses copper telephone lines that are already in place. It’s an older technology that usually works slower and less reliably than fiber or cable. In many rural areas, it’s the only choice.
- Satellite (like Starlink or Viasat): This is a lifeline for people who live in very remote areas and don’t have any other options. It sends a signal to a satellite in space. It can be affected by the weather and usually has a lot of latency, so it’s not good for fast-paced online gaming.
- 5G Home Internet (e.g., T-Mobile, Verizon): This is a newer type of internet service that uses cellular networks to get internet to your home. It can offer speeds that are comparable to cable, and it is becoming a real option, especially in cities and suburbs with good 5G coverage.
Step 2: Getting Ready—Choosing Your Modem and Wireless Router
After you sign up with an ISP, they will either send you a self-install kit or set up an appointment for you to have the service installed. You can buy your own equipment or get it from this kit.
Should You Rent or Buy? The Big Modem and Router Argument
For a monthly fee of $10 to $15, your ISP will gladly rent you a gateway (a modem and router in one).
- Renting (Pros): It’s easy. The ISP gives it to you, makes sure it works with your system, and will help you if it breaks or needs to be replaced. For a true beginner, this is the easiest and least hands-on way to do things.
- Renting (Cons): The monthly fee adds up. You could spend $360 on a device that might only be worth $150 over the course of two years. The equipment that ISPs give you is often basic and doesn’t have many advanced features. It might also not work as well as equipment you buy on your own.
- Buying (Pros): You save money in the long run. You can pick a model that works better and has the newest tech, like Wi-Fi 6E or Wi-Fi 7. You can change all of its settings. Good tech review sites like Wirecutter or CNET can give you great advice.
- Buying (Cons): It costs more up front. It is your job to make sure it works with your ISP (they have a list of approved models on their website). You also have to take care of your own technical support.
For Beginners: If this is your first time, it’s fine to start with the equipment that your ISP rents you. You can always choose to get your own modem and router later when you’re more comfortable.
How to Understand Your Modem: The Internet Gateway
The most important thing to think about when buying your own modem is whether or not it will work with your ISP. Before you buy anything, check out your ISP’s “approved modem list” or “compatible devices” page. If you buy a modem that isn’t on this list, you might get angry because they might not let you use it.
Picking the Right Wireless Router: The Heart of Your Home Network
This is where you can have a big effect on your daily Wi-Fi experience. If you want to buy your own router, here’s what to look for in 2025 and later:
- **What Wi-Fi 5, Wi-Fi 6, Wi-Fi 6E, and Wi-Fi 7 Are:
- Wi-Fi 5 (802.11ac): A standard that is no longer used. If you can, don’t buy a new Wi-Fi 5 router.
- Wi-Fi 6 (802.11ax): This is the most common standard right now. It’s a lot faster and better than Wi-Fi 5, especially in homes with a lot of devices connected to the internet. It’s a great choice for both value and performance.
- Wi-Fi 6E: This standard adds a new, exclusive 6 GHz frequency band. Think of it as a new, wide-open road for your newest devices, free of the traffic and interference from the older 2.4 GHz and 5 GHz bands. It’s great for making sure it will last.
- Wi-Fi 7 (802.11be): The newest standard, which promises even faster speeds and less lag. Devices and routers are available, but it’s still new and costs a lot of money. For most people, Wi-Fi 6 or 6E is more than enough.
- Routers with One, Two, or Three Bands:
- Dual-Band: This is what most modern routers use. It sends out two networks: one on the 2.4 GHz band, which is slower but has a longer range and is better at getting through walls, and one on the 5 GHz band, which is faster but has a shorter range.
- Tri-Band: These routers have a second 5 GHz band or, for Wi-Fi 6E/7, a 6 GHz band. This helps keep the network from getting too busy in homes with a lot of demanding devices.
- **Mesh Wi-Fi Systems: Are They the Answer for Bigger Homes and Dead Zones?If your home is more than 2,500 square feet, has more than one floor, or has walls made of plaster or brick that block Wi-Fi signals, one router may not be enough. A *Mesh Wi-Fi system* (like Eero, Google Nest Wifi, or TP-Link Deco) has a main router and a number of smaller “nodes” or “satellites” that you put around your house. Together, they make a strong, seamless Wi-Fi network that covers your whole house. They work much better than regular Wi-Fi range extenders to get rid of dead zones.
- Important Router Features to Look For: Look for terms like “MU-MIMO” (which lets the router talk to more than one device at a time) and “Beamforming” (which sends the Wi-Fi signal directly to your connected devices). Another great feature is “Quality of Service” (QoS), which lets you give priority to traffic to certain devices or apps. For example, you could give your work laptop priority over your kids’ tablet during a video call.
Step 3: The Main Event—A Step-by-Step Guide to Setting Up a Wireless Router
You have your equipment and have chosen your ISP. Now is the time to set up the physical space. Don’t worry; this is an easy process if you do it in the right order.
A Step-by-Step Guide to Unboxing and Setting Up Physically
- Look at the Quick Start Guide: There will be a small instruction book that comes with your modem and router. It’s always a good idea to look at it because there may be instructions that are only for that model.
- Set Up Your Modem: Put your modem close to the wall outlet that your internet service uses (the coaxial, fiber, or phone jack).
- Connect the Modem to the Wall: Use the main service cable (like the coaxial cable) to screw it tightly into the right port on the back of the modem. After that, connect the modem’s power adapter to the modem and a power outlet.
- Wait for the Modem to Start Up: This could take anywhere from 2 to 10 minutes. The modem’s lights will blink in a certain order. You need to wait for the light that says “Online,” “Internet,” or the globe to turn solid green or blue. This means it has successfully linked up with your ISP’s network. If it keeps blinking after 10 to 15 minutes, check your cable connections again or call your ISP for help. They might need to turn it on from their end.
- Find the Sweet Spot for Your Router: Now, pick the best place for your wireless router. This is one of the most important steps for good Wi-Fi that people often forget.
Finding the Sweet Spot: The Best Place to Put Your Router for Best Performance
Don’t put your router in a closet, cabinet, or basement. Radio waves make up Wi-Fi signals, and they get weaker the farther away they are and when there are physical barriers in the way. For the best coverage:
- Go Central: Put the router in the middle of your house.
- Stay Open: Don’t hide it away in a cabinet or behind the TV; keep it out in the open.
- Get Higher: Put it on a table or shelf, not on the floor.
- Stay Clear of Obstacles: Don’t put it near thick walls (especially brick or concrete), big metal things (like filing cabinets or refrigerators), or water (like a fish tank).
- Reduce Interference: Keep the router away from other electronic devices that can mess with it, like cordless phone base stations, Bluetooth devices, and microwave ovens.
- Link the Modem to the Router: Use an Ethernet cable. Connect one end to the modem’s Ethernet port. Connect the other end to the router’s “WAN” (Wide Area Network) or “Internet” port. This port is usually a different color than the other LAN ports on the router. It is usually blue or yellow. This is a very important step; a lot of people plug it into the wrong port.
- Turn on the Router: Connect the router’s power adapter to the router and then to a wall outlet.
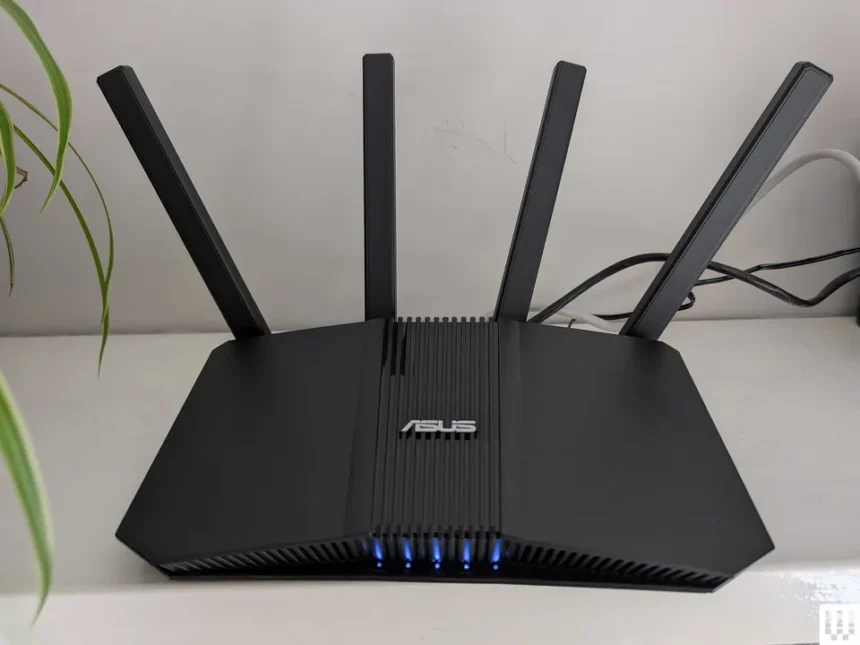
- Wait for the Router to Boot Up: The router will also take a few minutes to start, just like the modem. You should see a light that says “power” and then a light that says “broadcasting Wi-Fi” (often with a radio tower symbol).
Well done! The physical part of the wireless router installation is done. It’s time to set up the software now.
Step 4: Getting to the Control Panel to Set Up Your Wi-Fi Network
Your router is now sending out a default, open network. The next steps are very important for personalizing your network and, most importantly, keeping it safe from people who shouldn’t be able to get to it.
How to Connect to Your Router for the First Time (Wired vs. Wireless)
You need to get to your router’s administrative interface, which is like a private website that the router itself hosts, in order to set it up.
- The Wired Method (Recommended): The best way to connect is to plug your computer directly into the router. Plug one end of another Ethernet cable into one of your router’s LAN (Local Area Network) ports (any one will do) and the other end into the Ethernet port on your laptop or desktop computer.
- The Wireless Method: Check the bottom or back of your new router for a sticker. It will show you the default Wi-Fi Network Name (SSID) and Password. To connect, look for this network in the list of Wi-Fi connections on your computer or smartphone, select it, and type in the password that was given.
A Guided Tour of the Router’s Admin Interface
- Find the Router’s IP Address: The sticker on your router usually has the address for the admin interface on it. Usually, it’s a number like “192.168.1.1” or “192.168.0.1,” or a web address like “tplinkwifi.net” or “routerlogin.net.”
- Log In: On the computer you connected to in the last step, open a web browser like Chrome, Firefox, Safari, or Edge. Type the router’s IP address into the address bar (not the search bar) and hit Enter.
- Enter Credentials: You will need to type in a username and password. You can also find these on the sticker that came with your router. The default username is “admin” and the default password is “password.”
After you log in, you’ll see the main dashboard for the router. It may seem complicated, but we only need to pay attention to a few important settings. A lot of new routers from companies like TP-Link or Netgear come with easy-to-use smartphone apps that can help you with this.
Important Steps to Take First to Set Up Wi-Fi Securely
This is the most important step in setting up Wi-Fi. Don’t skip these steps.
- Change the Default Admin Password: This is the password you used to get into the router’s settings. Keeping it as the default is a huge security risk. Look for the “Administration,” “System Tools,” or “Password” section and change the password to something strong and unique.
- Pick a New Wi-Fi Network Name (SSID): The SSID is the name that your network sends out to everyone. Change the default name (like “TP-Link_1234” or “NETGEAR55”) to something that isn’t already in use in the “Wireless” or “Wi-Fi” settings.
- Pro Tip: Don’t put personal information like your last name or apartment number in your SSID. Be creative!
- Make a Strong Wi-Fi Password: This is the code that lets your devices connect to your network. This setting will be in the “Wireless” part of the menu.
- Security Protocol: You will see a choice for the type of security. If you can, choose WPA3 because it is the newest and safest standard. If not, you should at least use WPA2 (or WPA2-PSK AES). Don’t use the older and less secure WEP or WPA options.
- Create a Strong Password: Your password should be at least 12 characters long and include a mix of uppercase letters, lowercase letters, numbers, and symbols. The more random and longer, the better.
Why You Have to Update Your Router’s Firmware
The router’s internal software is called firmware. Manufacturers often put out updates to fix bugs, make things work better, and add new features.
- How to Update: Find a “Firmware Update,” “Router Update,” or “System Update” section in the router’s admin interface. Most new routers can automatically check for and download updates. To see if there is new firmware, click the button. If there is, install it. Your router may need to restart during this process.
Step 5: Connecting Your Devices and Making Your Experience Better
The last step is to connect all of your devices and learn a few tricks to keep everything running smoothly.
Linking laptops, phones, smart TVs, and more
Go to the Wi-Fi settings on each of your Wi-Fi-enabled devices. Find the new network name (SSID) you made, select it, and type in the strong Wi-Fi password you set. Your device should connect in a matter of seconds. You can connect all of your devices, such as your phones, tablets, laptops, smart TV, gaming console, and any other smart home gadgets.
Setting Up a Guest Network: Easy and Safe
Most new routers have a feature called “Guest Network.” This is a great tool. It makes a second Wi-Fi network that is separate from your main one for your guests. They can get online without being able to see your shared files, your main network, or any of your other connected devices. This is a simple and very effective way to keep your information safe. Most of the time, you can find this choice in the “Wireless” or “Guest Network” settings on your router’s admin page.
Simple Ways to Fix Problems with Your New Home Internet Setup
Don’t worry if things aren’t working. You can fix 90% of home networking problems with just a few easy steps.
- The Universal Fix (Power Cycle): Before you do anything else, try turning it off and on again.
- Take the power cord out of both your modem and your router.
- Hold on for a minute. This is important so that the internal parts can completely reset.
- First, plug the modem back in. Wait until the lights are steady, especially the “Online” light.
- After the modem is fully online, plug the router back in and let its lights settle down.
- Try to connect again.
- Look at the Indicator Lights: The lights on the front of your modem and router are for testing. If you look up your model’s manual online, you can find out what each light and color means. For example, a red internet light usually means that your ISP is not connected.
- Check Your ISP’s Status: If the internet isn’t working, look at your ISP’s website or social media pages. They often post about power outages in the area.
Useful Wi-Fi Tips for Everyday Life
You are now in charge of the network! Here are some useful tips that you can use every day to get the most out of your setup.
- Check Your Speed: You can check your internet speed by going to a site like Speedtest.net or Fast.com. To find out how fast your ISP is really sending you data, run the test while connected by Ethernet cable. Then run it again on Wi-Fi to see how well your wireless network works.
- “Forget” Old Networks: To make sure your devices always connect to your main home network automatically, make sure to “forget” any old Wi-Fi networks from your old home or coffee shops.
- Manage Your Bands: If your router has two bands, you will see two networks, like “MyAwesomeNet” and “MyAwesomeNet_5G.” If you have stationary, high-performance devices like your smart TV, gaming console, or work computer, it’s best to connect them to the faster 5 GHz band. Use the longer-range 2.4 GHz band for mobile devices or smart home gadgets that are further from the router.
- Schedule Reboots: Routers are like little computers, and like any computer, they can benefit from being restarted every now and then to clear their memory. Some routers let you set up a weekly automatic reboot in the middle of the night. If not, doing it by hand once a month can help things run more smoothly.
- Use Parental Controls: If you have kids, look into the parental control options on your router. You can often block certain websites, limit internet access to certain times of the day for certain devices, and get reports on how much you use the internet.
Advanced Corner: Optional Ways to Improve Your Home Wi-Fi
After you get the hang of the basics, you can look into a lot of advanced settings to make your network even more unique and efficient. These aren’t necessary for a normal setup, but they’re there if you want to know more.
- Changing DNS Servers: You can sometimes speed up your browsing and add an extra layer of security by switching your DNS servers to a public service like Google DNS (
8.8.8.8) or Cloudflare DNS (1.1.1.1). - MAC Address Filtering: This lets you make a list of devices that are allowed to connect to your network and blocks all others.
- Port Forwarding: This is needed for some online games or to run a home server. It lets you send certain types of internet traffic to a specific device on your network.
For now, it’s enough to know that these things exist. You’ve already learned the basics.
Conclusion: You’re Linked! Have fun with your new Wi-Fi at home.
You did it. You have successfully completed the entire home internet setup process, from picking a provider to installing and setting up the wireless router. You’ve turned a box of cables and plastic into a strong, safe place for all your digital stuff. Now you know not only how to get Wi-Fi, but also how to set it up, protect it, and make it work better.
Your new Wi-Fi network is the invisible backbone of your modern home. It’s the way you connect to the world, do your work, learn, and have fun. Take a second to enjoy the blinking lights on your router. They show how much more tech-savvy you are now.
So go ahead and stream that 4K movie, join that important video call, and explore the huge world of the internet with the peace of mind that you made the connection yourself.
We’d love to hear about what you went through! Leave your own tips for setting up Wi-Fi or ask any other questions you still have in the comments.
https://diolichat.rw/technology
Source Links
- FCC National Broadband Map: https://broadbandmap.fcc.gov/home
- Wirecutter by The New York Times (Router Reviews): https://www.nytimes.com/wirecutter/reviews/best-wi-fi-router/
- TP-Link Support Center: https://www.tp-link.com/us/support/
- Netgear Support: https://www.netgear.com/support/
- Cloudflare DNS 1.1.1.1: https://1.1.1.1/dns/