
Hey, fellow explorers and would-be artists! It’s your go-to place for all things visual, and I’m back with a topic that’s very dear to my heart. I still remember my first real try at taking pictures of landscapes. I had a big, old camera, a lot of ambition, and no clue what I was doing.
I stood in front of a truly beautiful sunrise over the hills and took a lot of pictures. Later, I found out that they were all blurry and poorly exposed. It was a humbling moment, but it made me want to learn more, understand the craft, and one day do justice to the beauty I saw with my own eyes.
This post is for you if that story sounds even a little bit familiar or if you’re just starting out on your journey. We’re going to go deep into the world of landscape photography and give you easy-to-follow tips on everything you need to know. Don’t worry about the scary jargon or the long lists of gear.
Today, we’re going to help you build your foundation step by step so that you can go from feeling lost to taking amazing pictures of nature. This is the beginner’s guide I wish I had when I was just starting out. Let’s take pictures of the world together!
The Most Important Gear: What a Beginner Really Needs
Walking into a camera store can feel like being in the cockpit of a space shuttle, with buttons, lenses, and price tags all over the place. Let’s get to the point. You don’t need the most expensive gear for beginner landscape photography; you just need the right gear.
Your First Camera: DSLR or Mirrorless?
The biggest argument for any beginner! Digital Single-Lens Reflex (DSLR) and Mirrorless cameras are both great options that can take pictures that look like they were taken by a pro.
DSLR Cameras: These are the old-fashioned workhorses. They have optical viewfinders (you can see through the lens directly), long battery life, and a huge range of lenses to choose from. For example, Canon’s Rebel series and Nikon’s D3500/D5600 models are good examples. On the second-hand market, they are often cheaper.
Tip for Real Life: For landscape photography, where you might be out in the field all day without access to power, the long battery life of a DSLR is a big plus.
Cameras without mirrors: This is the latest technology. They are usually smaller and lighter, and they have electronic viewfinders (EVFs) that show you a digital preview of your exposure in real time. This “what you see is what you get” feature is a big deal for a beginner. Sony (Alpha series), Fujifilm (X-series), and Canon (EOS R series) are some of the best brands in this area.
Helpful Hint: When you’re hiking to a remote spot to get the perfect shot, the fact that mirrorless systems are lighter can make a big difference.
Interlink: For a more in-depth comparison, read our full post: [Link to a hypothetical blog post: DSLR vs. Mirrorless: Which is Right for You in 2025?].
The lens is your window to the world.
The lens is the eye, and the camera body is the brain. A versatile lens is very important for landscape photography.
The Kit Lens: The 18-55mm lens that comes with a lot of beginner cameras is not something to overlook! It has a great range, from wide-angle (18mm) for taking pictures of big scenes to a more standard view (35–55mm) for focusing on small details. Get to know all of its features.
The Wide-Angle Lens: As you get better, you should probably buy a dedicated wide-angle lens, like a 10–20mm for crop-sensor cameras or a 16–35mm for full-frame cameras. This lets you take pictures of the huge, beautiful views that are typical of classic landscape photography.
**Link to the source: Visit a reliable site like [Link to a reputable camera gear review site like DPReview or Ken Rockwell] to read lens reviews and comparisons.
A Strong Tripod Is the Unsung Hero
For serious landscape photography, a tripod is not something you can skip. You will buy this one thing more than any other. It makes you slow down and carefully plan your shot, and most importantly, it keeps your camera perfectly still. This is very important for getting clear pictures, especially when the sun is low in the sky.
What to Look For: Find a tripod that is strong enough to hold your camera steady but not so heavy that you don’t want to carry it. Carbon fiber is lighter but more expensive; aluminum is a fantastic, budget-friendly option for a beginner. A good ball-head mount makes it easy to change the way you frame your shot.
Helpful Hint: Don’t buy the cheapest, weakest tripod you can find. A mid-range tripod from a brand like Manfrotto, Benro, or Peak Design will last you for years and is a much better value.
Mastering Your Camera: The Exposure Triangle for Landscapes
You have your stuff now. It’s time to stop using “Auto” mode and start being creative. For any beginner, it’s important to know the three main settings: Aperture, ISO, and Shutter Speed. This is what people call the Exposure Triangle.
Aperture (f-stop): How to Control Depth of Field
The aperture is the hole in your lens that lets light in. It is measured in f-stops, such as f/2.8, f/8, and f/16. In landscape photography, the aperture is the main tool you use to control Depth of Field (DoF), which is how much of your scene is in sharp focus, from the front to the back.
The Goal: You want a deep depth of field in most landscapes, which means that everything from the flowers at your feet to the mountains in the distance is clear.
How to Get It: Set the aperture to a lower number (a higher f-stop number). For landscapes, a good place to start is between f/8 and f/11. This range is often the “sweet spot” for many lenses because it gives the sharpest image across the whole frame. Diffraction can make your picture softer if you go too high (like f/22).
Helpful Tip: Set your camera to “Aperture Priority” mode, which is also known as “A” or “Av.” You choose the aperture (like f/11), and the camera automatically picks the shutter speed that will give you a good exposure. Most landscape photographers use this mode all the time.
ISO: How Sensitive Your Camera Is to Light
ISO tells you how sensitive your camera’s sensor is to light. A low ISO, like 100 or 200, needs more light to work, but it makes a picture that is very clean and has no noise. A high ISO, like 3200 or 6400, is very sensitive and works well in low light, but it adds digital “noise” or graininess.
The Rule: Always use the lowest native ISO possible (usually ISO 100) when taking pictures of landscapes. You don’t have to worry about camera shake because you’re using a tripod. This means that the camera can use a slower shutter speed to let in enough light.
Helpful Hint: Lock your ISO at 100. You should only raise it if you’re shooting with a handheld camera in low light or trying to get stars (which is a more advanced topic). One of the most important things about great landscape photos is that they are clear and free of noise.
Shutter Speed: Taking Pictures of Time and Motion
The shutter speed tells you how long the sensor in your camera is open to light. When the shutter speed is fast (like 1/1000s), it freezes motion, and when it’s slow (like 10 seconds), it blurs motion. You can be creative with shutter speed when your camera is on a tripod.
Long Exposure: This is where the fun begins! You can change the way moving things look in your scene by using a slow shutter speed. Clouds move across the sky like streaks, and car lights turn into rivers of light. This method can make your landscape photography look more alive and otherworldly.
Useful Advice: You’ll need a Neutral Density (ND) filter to get long exposures during the day. It works like sunglasses for your lens by letting in less light, which makes the camera use a much longer shutter speed.
Interlink: In our guide [Link to a fake blog post: The Beginner’s Guide to Long Exposure Photography], we go into great detail about this method.
The Art of Seeing: Tips for Beginners on How to Compose
Even a technically perfect picture can be boring. Composition is the skill of putting things in your frame in a way that makes the picture look good and have an effect. These tips will help you turn your beginner landscape photography from simple snapshots into beautiful art.
The Thirds Rule
This is the most important rule of composition. Picture two horizontal and two vertical lines dividing your frame into nine equal rectangles. The Rule of Thirds says that you should put important parts of your scene along these lines or where they cross. Don’t put your horizon line right in the middle of the frame; instead, put it on the top or bottom third.
Useful Tip: Most cameras let you show a 3×3 grid on the screen or in the viewfinder. Start it up! It’s a great tool for someone who is just starting out.
Lines that lead the eye and things of interest in the foreground
Don’t just aim your camera at the mountains in the distance. Look for things that draw the viewer’s eye into the scene.
Leading Lines: Find lines in nature or made by people, like a winding river, a fence, a road, or a line of rocks, that start near the bottom of your frame and lead to your main subject. This gives the image depth and helps the viewer move through it.
Foreground Interest: Adding a strong foreground element, like a colorful wildflower, an interesting rock, or a piece of wood that has been around for a long time, makes your picture look three-dimensional. It gives the viewer something to focus on before their eyes move to the middle and back.
Tip for Real Life: Get low! Look at things from a different angle. Don’t just shoot from a standing position. When you crouch down, your foreground can change a lot, making the composition much more interesting.
Framing and Balance
Framing: Use things from nature to make a “frame within a frame.” Shooting through an archway of trees, a cave opening, or a window can help your scene feel more real and give it more depth.
Symmetry and Reflections: Try to use symmetry whenever you can, especially when you see reflections in calm water. In this case, putting the horizon line in the middle can make a strong, balanced picture.
Backlink: To get ideas, look at the portfolios of famous landscape photographers like Ansel Adams or Michael Kenna, or a contemporary artist.
Chasing the Light: The Most Important Thing
Even if you have the best gear and the perfect composition, bad light will make your photo look flat and boring. In landscape photography, light is everything.
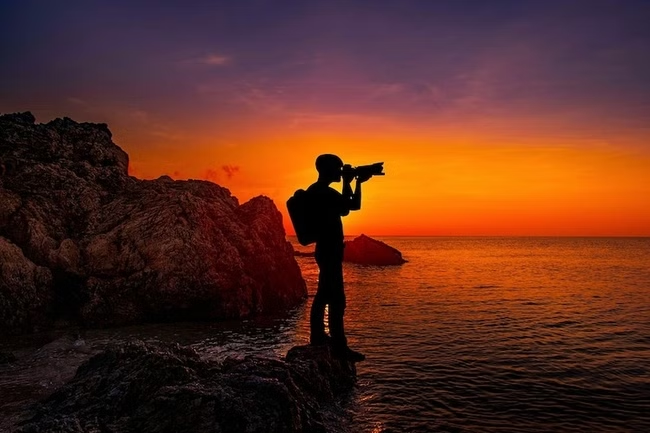
The Magic Hour: The Golden Hour
The “Golden Hour” is the time just after sunrise and just before sunset. The sun is low in the sky at this time, and it casts a soft, warm, golden light. Shadows are long and dramatic, showing off texture and setting a lovely mood.
Tip for the day: Schedule your shoots for early morning and late evening. Yes, it means getting up early or staying out late, but the reward is worth it. Plan exactly where the sun will rise and set with an app like PhotoPills or The Photographer’s Ephemeris.
The Blue Hour and the Dark
The “Blue Hour” is the time right before and after sunset when the sun is below the horizon but its light is still there. The light becomes calm, blue, and cool. It’s great for cityscapes and peaceful scenes in nature.
Helpful Hint: Don’t put away your gear right away when the sun goes down! The light at dusk can be very pretty, and because it’s not often photographed, you can make one-of-a-kind pictures.
How to Use “Bad” Light
How about the middle of the day, when the sun is high and bright? It can be hard, but you can still take great pictures. Find things that look good in bright light, like black and white architectural details. Or go into a forest, where the tree canopy will soften the bright sunlight and cast soft, dappled light on the ground. Overcast, cloudy days are also great for taking pictures of rivers and waterfalls because the clouds act like a big softbox, making colors brighter and getting rid of harsh reflections.
The End: Your Journey Begins Now
We’ve talked about a lot of things, like gear, settings, composition, and light. But keep in mind that this is just a guide. The best advice for anyone new to landscape photography is to just go out and practice.
Use these tips as a starting point, try them out, and break the rules to find your own style. It’s okay if your first pictures aren’t perfect. Mine weren’t at all. But you’ll learn something new with each click of the shutter. You’ll learn to look at the world in a new way, to notice how the light changes, and to appreciate how beautiful everything is in its own way. That is, in the end, the best thing about landscape photography.
Now, get your camera, choose a place, and go take a picture of something pretty. I can’t wait to see what you make.
https://www.dpreview.com/reviews
https://www.bhphotovideo.com/explora/photography